 Have you ever dreamed of having your own concrete fire pit? Didn’t want to spend the costly amount for one at Home Depot? Well, I have the solution for you! Make your own. Not only is it affordable, but it turns out looking manly, and works just as well as anything you could buy premade. Also, the cost is pretty darn attractive too! It runs under $50 and can be made in just a few short hours. If you’re a do-it-yourself kind of guy you will love this project.
Here is what you’ll need:
- Concrete Mix
- One extra-large bowl for exterior mold (17” diameter)
- One large bowl for interior mold (15” diameter)
- Non-stick cooking spray, or vegetable oil and paint brush
- Large bucket for mixing
- Medium-duty masonry trowel
- Proper safety gear for working with concrete:
- 3M Tekk Protection N96-Rated Dust Mask for sanding and grinding
- Safety glasses or goggles
- Refinishing or work gloves
- Plastic or reusable drop cloth
- Heavy Objects such as exercise weights (or you can use the rocks below)
- Sandpaper or sanding pad in coarse and fine grits
- Gel fireplace fuel canisters
- Replacement grill grate (14 1/2” diameter)
- Fire safe decorative stones
Make sure that when you decide to start on this project you find the right materials and you work with extreme safety! Also, find the largest mixing bowls you can find in order to make the main fire bowl. We opted for a stainless steel mixing bowl for the inside.
Be careful when you’re working with concrete! It can be toxic so make sure you work in a well-ventilated area. Also, make sure you wear your safety glasses, mask and gloves.

1. Once you prep everything spray your molds with a thick even layer of non-stick spray. It will help the concrete to release when it is all dry.
2. Mix up your concrete adding water until it reaches a thick cookie batter-like consistency.
3. Check the inner mold to see just how high the concrete rises on the sides. **It’s fine to take the inner mold in and out a few times just as long as you don’t lose all of your non-stick spray.
A few things to remember while doing this:
- Make sure it’s centered so it will be an even thickness all around.
- Keep the lips of the bowls even so you will have a symmetrical finished product.
- Adjust the weights so that you have the biggest inner bowl as possible while keeping the structure thick enough for strength. But you want to make sure you have enough space on the inside so you can place your gel canisters beneath the lip of the bowl.
4. Be sure to check for any bubbles. You want your bowl to be a smooth finished surface. Use a reciprocating saw without a blade and run it along the bowl while it is curing to ensure it gets all of the air bubbles out. An immersion blender would work as well! Anything that you can run alongside the outside surface of the bowl.
Let the concrete dry for around 48 hours or so.
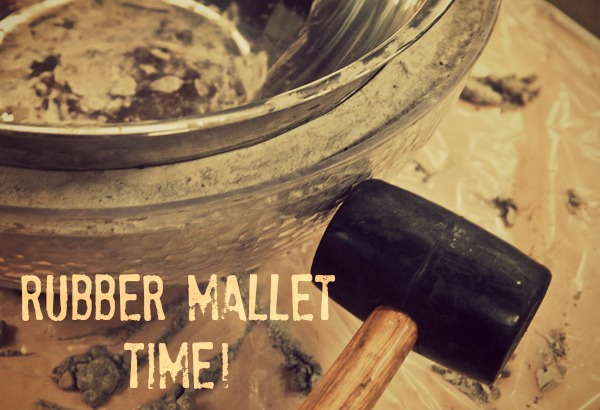
5. First remove the inner bowl and then remove the concrete from the biggest bowl. Tap on the sides of the bowl gently with a rubber mallet ensuring that all of the sides come out easily.
6. Afterward, sand it down with your coarse sandpaper and give it a nice rounded look.
7. Finally, take it outside and place the gel fuel canisters inside. You can find these most often at your local hardware store or online.
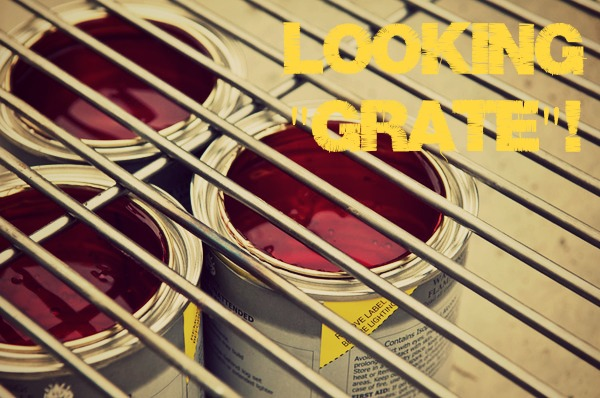
8. Place your grill grate in the bowl. The one used in the picture is from a Weber kettle grill. It was about 14.5”.
9. Now the fun is about to start! Put your rocks on top to cover the grate. Make sure your rocks are the appropriate type and will stand up to high heat.